


Hello good people! In this article, I'll present to you a new CloudFlare feature called Pages. This new feature lets you deploy a Frontend Web app easily and fast.
First I'll be introducing CloudFlare and CloudFlare Pages. Next, I'll quickly compare it to the current alternatives. Then, I'll walk you through the process of deploying your own project. Finally, we'll explore more advanced settings with this tool.
What are CloudFlare and this Pages feature? ☁
CloudFlare is mostly known for its Content Delivery Network (CDN) services. While CDNs are an interesting subject I'll consecrate an article for them soon. For now, the main highlight is that CF has a distributed network of servers that boosts the loading of websites worldwide.
In a nutshell, CF is trying to make the Web better by providing us with a robust CDN, DDoS mitigation, easy to set up HTTPS, and much more. The next step they took in this direction is the Pages feature. It's a Jamstack platform in other terms, it lets you easily deploy a Frontend app or static Website.
CloudFlare pages are not a new concept 📃
Let's get this out of the way, CF Pages is not a new concept. For instance, Github Pages is basically the same thing. There's also the excellent Netlify or GitLab Pages. So now you might ask yourself "Why bother with yet another tool?"
This is a legitimate question, let me list few reasons:
- For each service, there are some pros and cons. The more choice we have, the better quality products we can expect.
- If you're already a CF user, chances are that this might be a perfect fit for one of your needs.
- CF is one (if not the) leader in terms of CDN, Web security, and robustness.
- That free tier is just fire! 🔥
Finally just one last clarification: I'm not trying to sell you CloudFlare services. I highly advise you to do your own research and choose the service that covers most of your needs.
Let's deploy our own CloudFlare Page ✨
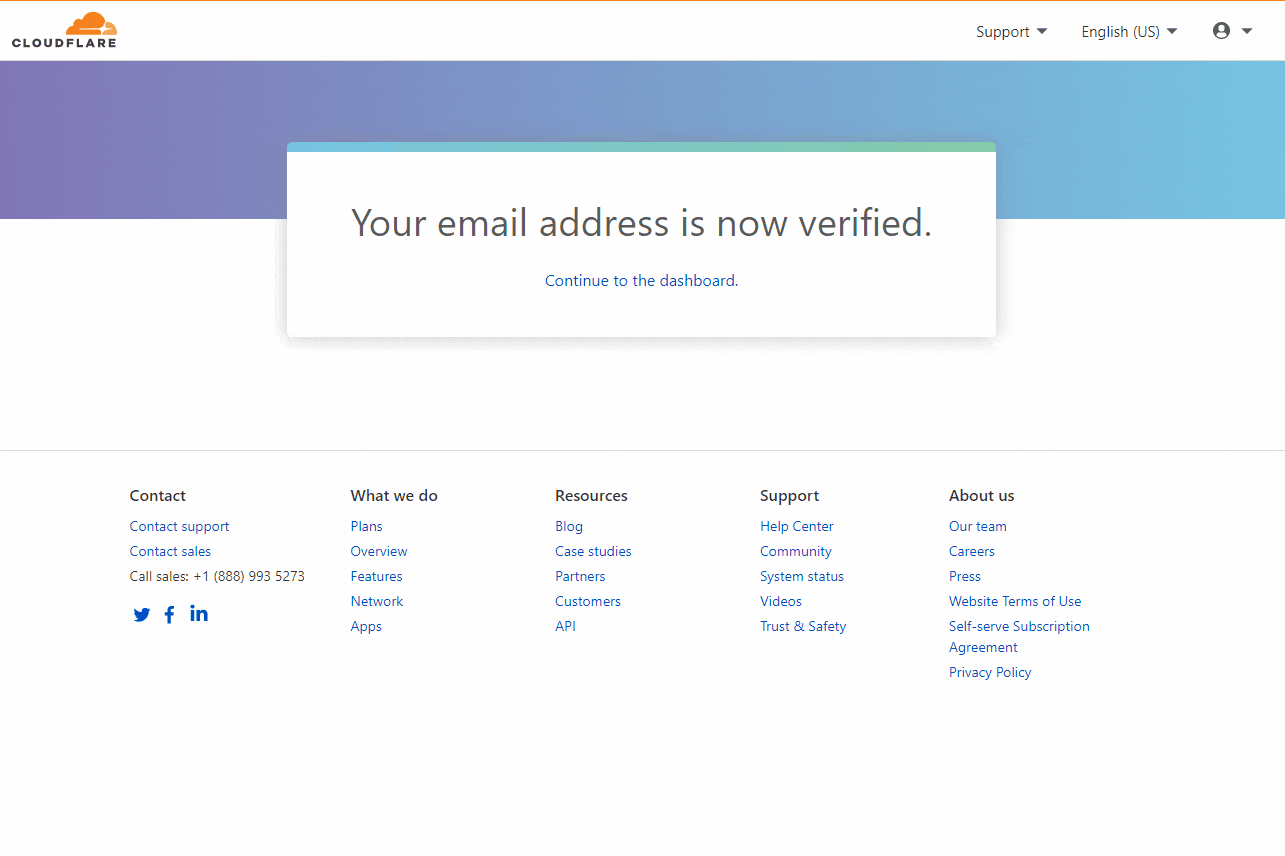
Start by heading to CloudFlare and create yourself an account. Next head to your email and confirm your account this will land you on a page as follows, just click the " Continue to the dashboard." link.
The GIF below shows:
- How you'll land on an empty dashboard after clicking the " Continue to the dashboard." link
- Next, click the "Pages" option on the right.
- This will land you on a webpage where you will create a project.
- Click "Create a project"
- This will lead you to a page where you can click the "Connect GitHub account" to link your GitHub account to CF.
- Authenticate your account, you'll be redirected to a page asking you to select a repository as follows:
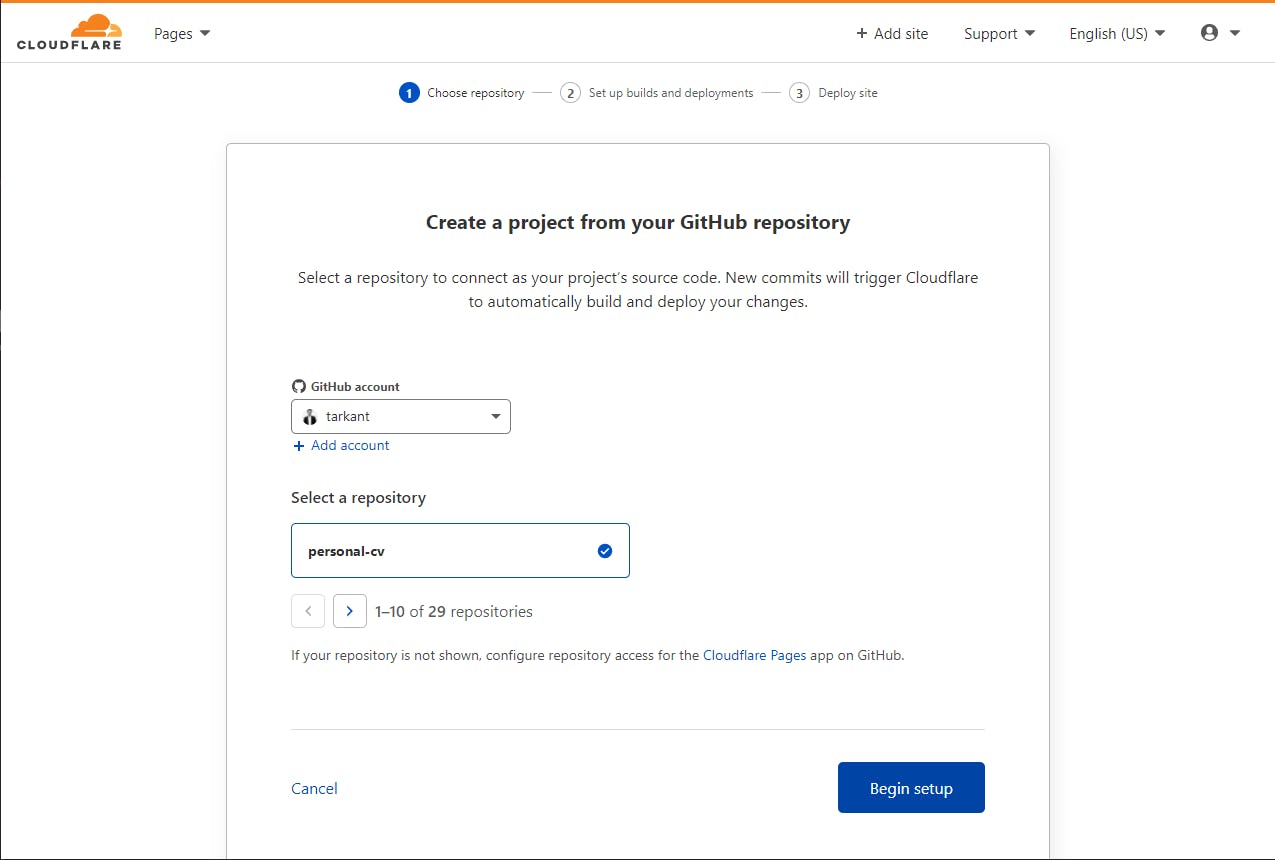
For this example, I've selected my "personal-cv" repository and clicked the button "Begin setup". You will be redirected to the following configuration page.
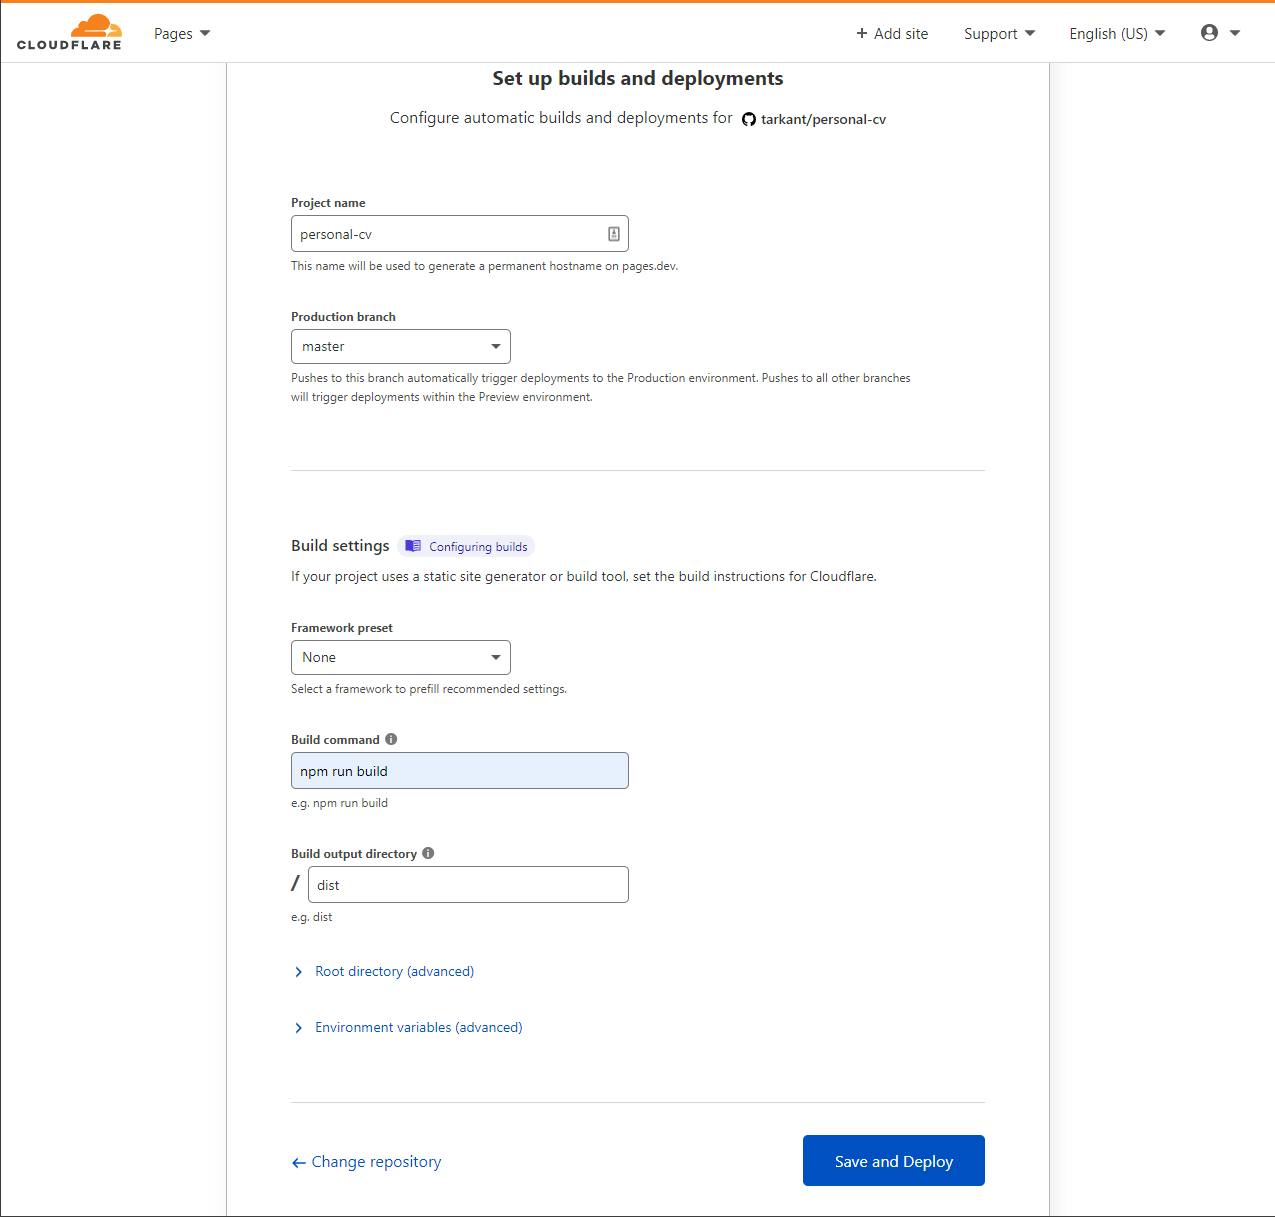
Let's break down all those settings:
- Project name is the name of your project, try choosing something unique as it will be used to generate your hostname.
- Production branch usually it's main or master, you can choose another branch if you like.
- Framework preset depending on the framework you've used to build your app, you might want to just use the preset, you can read more about it here. In my case, I'll choose None and set my own build command.
- Build command in my case
npm run buildwill build my project and copy everything in a/distfolder. If you didn't use a preset or you have a specific command, you can enter whatever you like. - Build output directory in my case (and usually) it's the
/distfolder. It might be different so pay attention to that. - Root directory (advanced) if you need this, I think you already know what you're doing 😉.
- Environment variables (advanced) this lets you set environment variables that your build will use. I'll be detailing this in a small subsection.
Once you've configured everything, hit "Save and deploy" and wait for the build and deploy process. Meanwhile, you can go fetch your favorite drink because it might take some time.
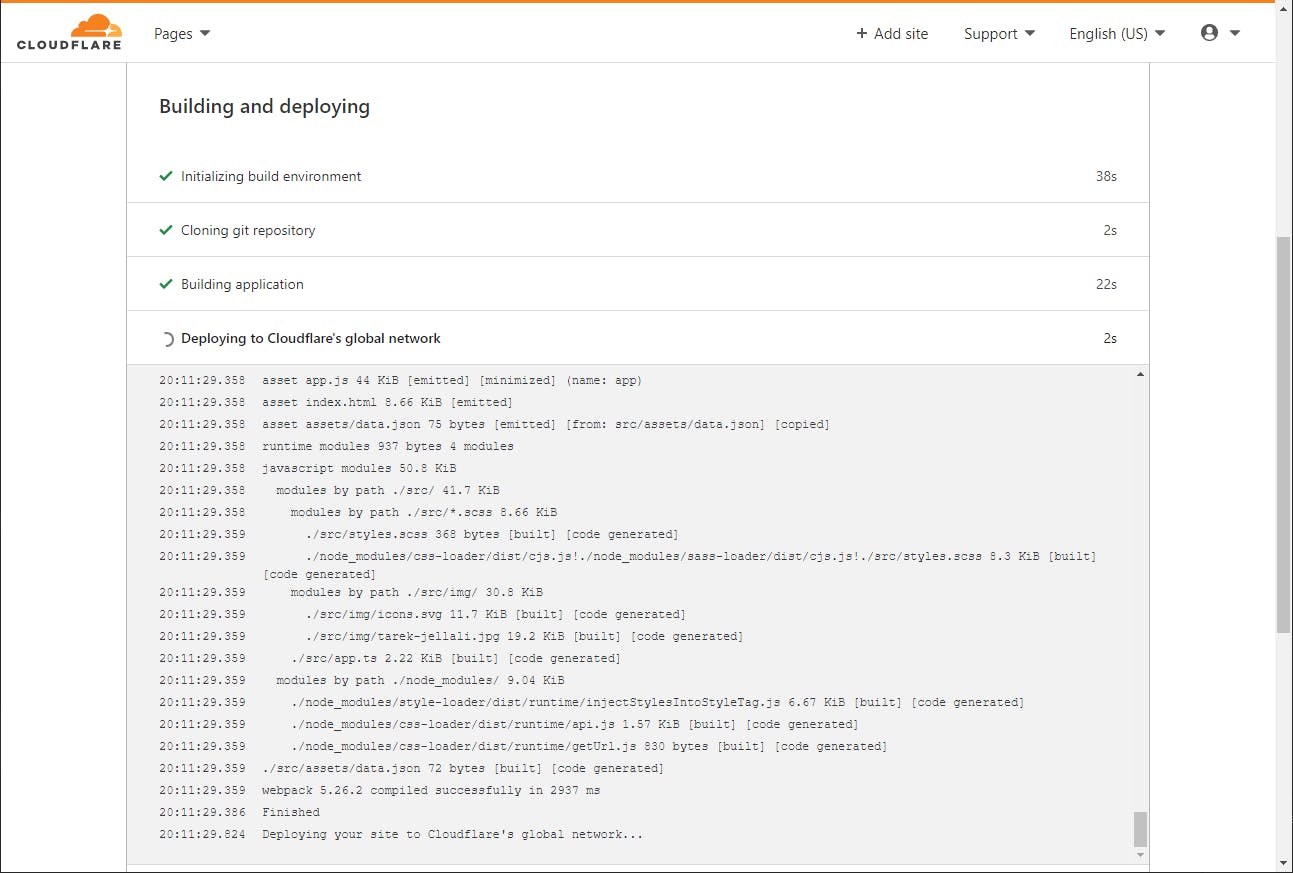
Once done, you should have your page up and running on, for example, your-project-name.pages.dev in my case since I've set it to personal-cv my page is at personal-cv.pages.dev. And that's it, your project is online! You can start building your awesome app ✨.
More options and settings ⚙
If you go back to the Pages section of your CF dashboard, you'll see your project. Nothing stops you from deploying more projects. However, for this last section, I just want to show you a few more powerful settings you can work with for your projects. Just click on your project's name and you'll see 3 tabs; deployments, custom domains, and settings.
Deployments 🛫
You'll notice a deploy status and under it a section called "All deployments", it lists a list of deployed snapshots for each commit you will push from now on. This works even for other branches than your main/master:
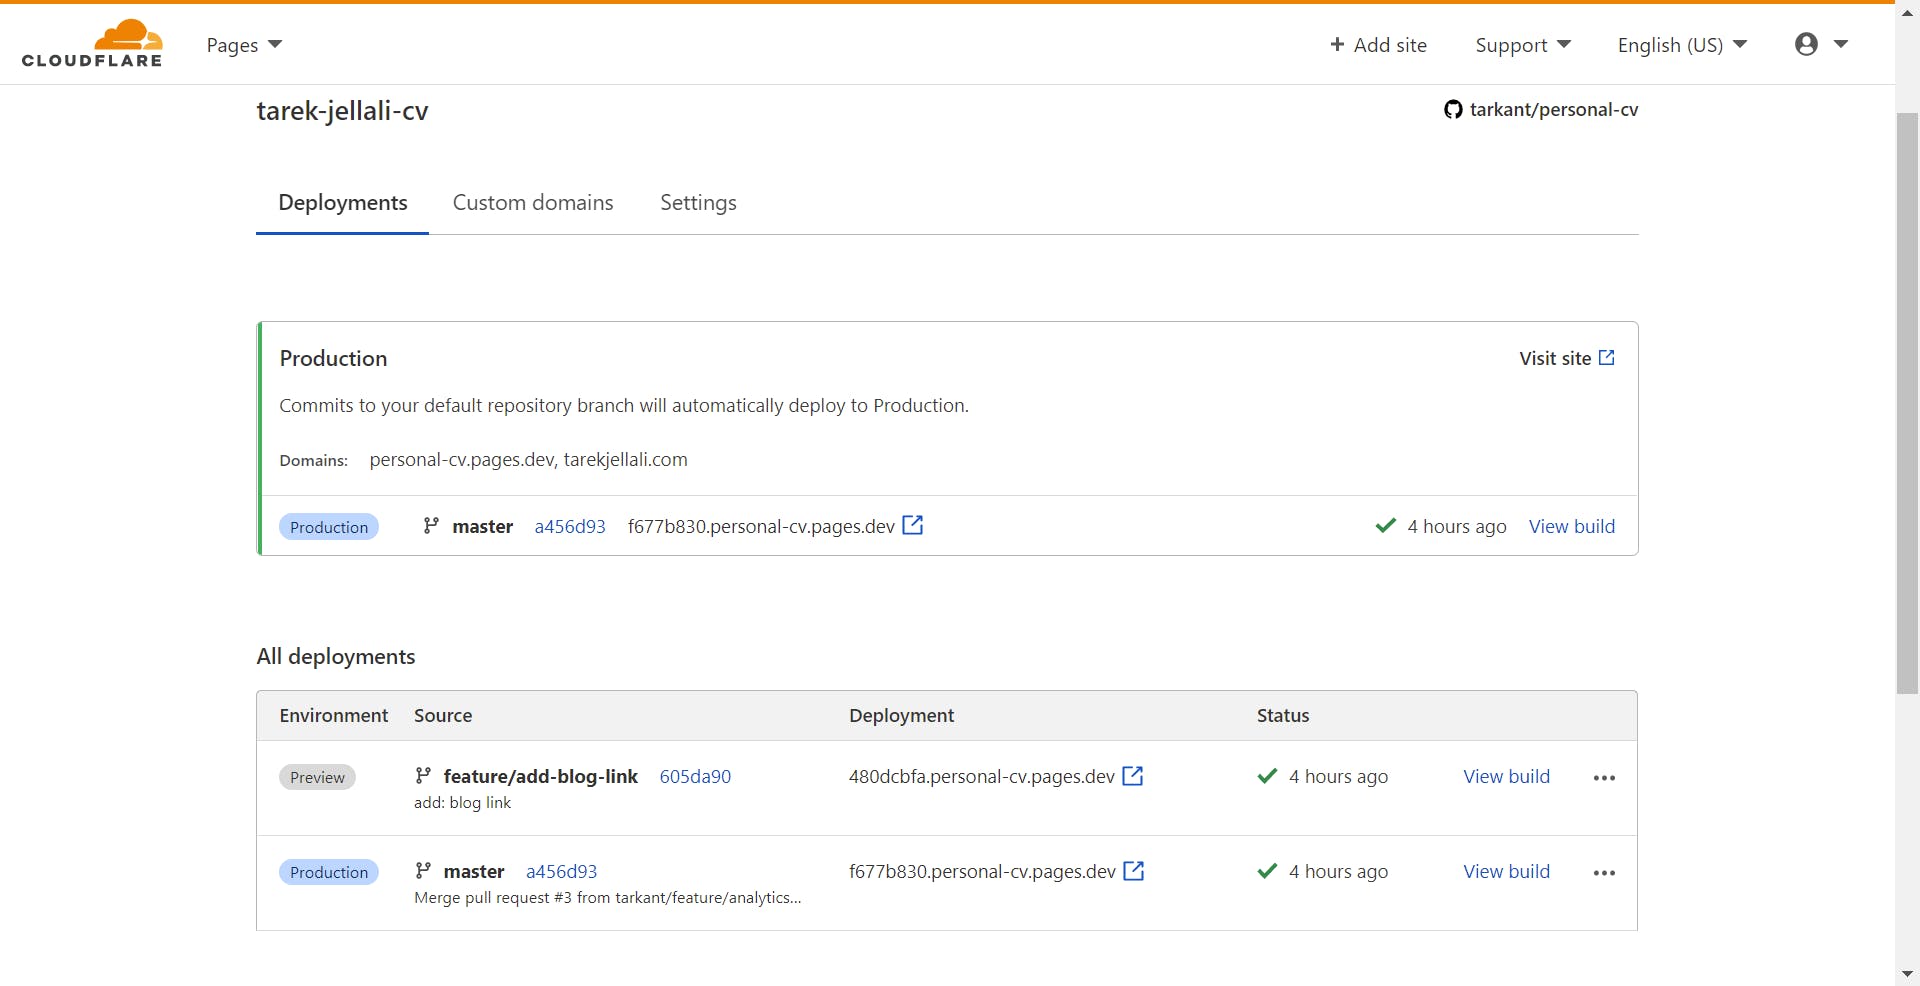
As you can see, I have a branch called feature/add-blog-link with the corresponding preview URL next to it. This is really handy if you want to share a preview of your work with friends and colleagues for example or see if everything is working in order.
Custom domains 🎨
If you don't like the preset URL CF Pages attributes to your project, you can bind a custom domain to your project, it's really straightforward and I invite you to do it! Mine is just bound to tarekjellali.com.
Settings 🛠
Settings is the last tab that's a little more advanced. In the sub-section "General" you can:
- Rename your project.
- Manage members to collaborate on your project.
- Manage access policies to your preview projects (your in-development branches for example like the one I demonstrated above).
- Enable Web analytics to have more insight into your project.
- Delete your project.
Next, in the "Builds & deployments" sub-section:
- Manage your production branch and preview branches (though the latter seems not available for now).
- Edit your build configuration.
- Manage your git integration and pause deployments.
Finally, "Environment variables":
- Manage your production environment variables.
- Manage your preview environment variables.
I'd like to touch on this last setting about environment variables just to explain more its purpose and how it works.
Environment variables 🎯
What are environment variables? Environment variables (or env) let you set values that your project can read and act accordingly to those values. Suppose your project has two modes, a production mode, and a development mode. When in production, your build will create an optimized and minified bundle of your app. If it's in development mode, it will generate a non-optimized bundle so you can debug it easily.
This is how lots of apps work. But you can also use your environment variables as some information you don't want to have on your GitHub project. Take for example Google's Analytics tracking code. You don't want that in your code, anyone who would fork your project might end up using it. To get around this problem, you can configure your app to take the Google Analytics code from the environment variables.
Say you define an environment variable called GA_ANALYTICS, you can read that information in your build script via process.env.GA_ANALYTICS pretty neat huh? 😏
I've done exactly that for my GitHub personal-cv project.
Wrap-up 📦
And that's it! Now you know as much as I know about CloudFlare Pages. What excites me really about this product is that it empowers developers who want to start small. The fact that it's free and accessible for everyone proves again how much CF wants to make the Web a better place.
If you feel that I've forgotten something or didn't explain something, please let me know.
Cheers!
Photo by @kenrickmills from Unsplash.com.